Alan Santos

Software Engineer

Installing Home Assistant on Raspberry Pi OS

Home Assistant also called Hass.io is one of the most famous open source home automation software, with it, you can control smart devices of your home with a smartphone, a web browser or a voice assistant like Alexa or Google Assistant. Hass.io perfect to run on Raspberry Pi, that allows us to transform our Raspberry Pi in an automation server.

Prerequisites

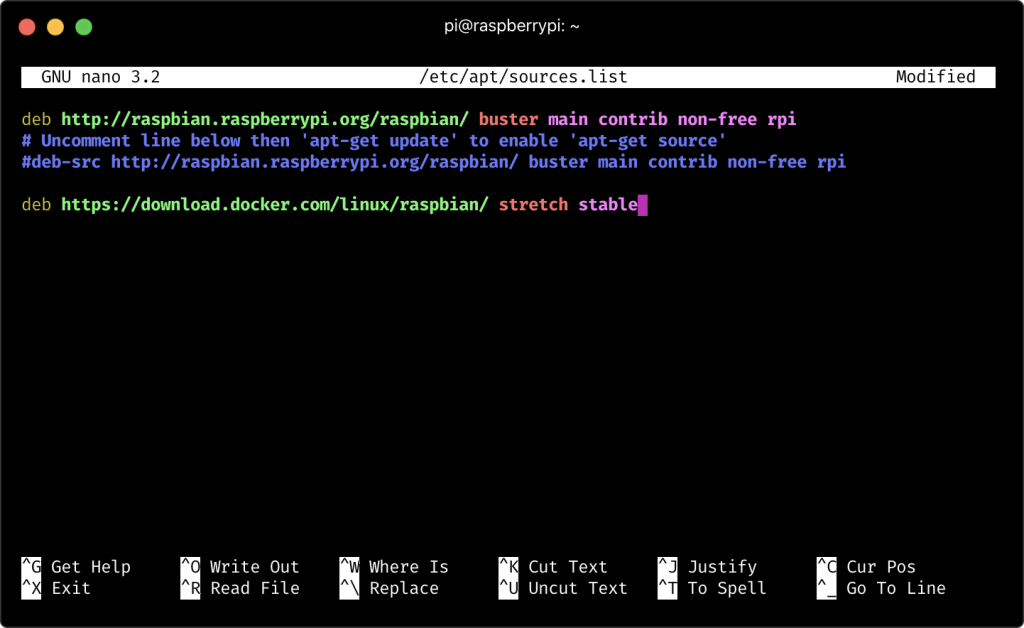
For this tutorial, you will need a Raspberry Pi with Raspberry Pi OS and Docker installed, you can find this tutorials on the links bellow:

Summary

What can I do with Home Assistant?

Here at my home, I control my vacuum robot, my TV, my PS4, my Raspberry Pi using Alexa + Home Assistant. In a future post, I will tech how can you setup all this devices in a free and security way, everything can be controlled by distance too.

Here is an example that you can do using Home Assistant + Alexa and smart objects:

“Alexa, open Crash Team Racing” and “Alexa, open God of War”
“Alexa, clean my bedroom”

Installing Home Assistant on Raspberry Pi

To install Home Assisntant, just follow the steps into Raspberry PI OS:

1. Install all Home Assistant dependencies:

sudo apt-get install apparmor-utils avahi-daemon dbus jq network-manager socat

2. Install Home Assitant:

sudo curl -sL https://raw.githubusercontent.com/home-assistant/supervised-installer/master/installer.sh | bash -s -- -m raspberrypi4

On the parameter -m raspberrypi4, you can choose one option of the list bellow based on you Raspberry Pi model and your Raspberry Pi OS:

  • raspberrypi
  • raspberrypi2
  • raspberrypi3
  • raspberrypi4
  • raspberrypi3-64
  • raspberrypi4-64

After the installation ends, you Home assistant is already installed on you Raspberry Pi. You can check access your Portainer using the address http://YOUR_RASPBERRY_PI_IP:9000

Configuring Home Assistant on first access

After install, access the address http://YOUR_RASPBERRY_PI_IP:8123 to configure Home Assistant and follow the steps bellow:

  1. Setup your name, your username and your password and press Create Account
  2. Setup your location and click in Next
  3. Click on Terminate
  4. Done, you Home Assistant is preconfigured
  5. Click on your user name on left bottom side of your screen and on user configuration page, select the option Advanced Mode
    • You can update your language like I did. I changed to English.

Thats it! Now that your Home Assistant is installed, we can move forward and integrate with some smart devices and communicate with Alexa to execute scripts using voice control. Bye!

Installing RetroPie on Raspberry Pi OS

Hi, have your heard about RetroPie? The most famous emulation software os Raspberry Pi. Today, I will tell you, how can you install on Raspberry Pi OS.

To follow this tutorial instructions, you will need a Raspberry Pi running Raspberry Pi OS. You can get the instructions how to install here.

Summary

Installing RetroPie

To install RetroPie, follow the steps bellow:

  1. Run the command sudo update-locale LC_ALL="en_US.UTF-8"
  2. Install the needed packages for the RetroPie sudo apt-get install git lsb-release -y
  3. Let clone RetroPie-Setup repository cd ~/ && git clone --depth=1 https://github.com/RetroPie/RetroPie-Setup.git
  4. Lets enter on the download repository folder cd RetroPie-Setup
  5. Let’s give permission of execution on the file retropie_setup.sh chmod +x retropie_setup.sh
  6. Lets run the command to initialize RetroPie installation sudo ./retropie_setup.sh and select the option Basic Install and press Enter
  7. Choose Yes
  8. The installation will begin. This may take a while.
  9. When it finish, move the cursor selection to the right and press Enter on option Exit

RetroPie now is installed. To start RetroPie, run the command emulationstation

Add ROMs on RetroPie

RetroPie on the first running will have no emulator options. To add new options, just add your ROMs on the respective folders on the path /home/pi/RetroPie/roms.

RetroPie ROMs Folder

Start RetroPie on boot (Optional)

If you want to start RetroPie on boot, just follow the steps on the Raspberry Pi OS terminal:

  1. Run RetroPie installation menu cd ~/RetroPie-Setup && sudo ./retropie_setup.sh and choose the option Configuration / tools
  2. Select autostart option
  3. Select Start Emulation Station at boot

Using PS4 on RetroPie controller without USB Cable (Optional)

RetroPie works with all kind of USB Joystick controllers, but if you have a Playstation 4 controller, you can use in wireless mode. Follow the steps bellow to configure:

  1. On you Raspberry Pi terminal, run RetroPie installation menu using the commands cd ~/RetroPie-Setup and sudo ./retropie_setup.sh and choose the option Configuration / tools
  2. Choose option Bluetooth – Configure Bluetooth Devices and press Enter
  3. Enter you PS4 controller on paring mode holding the Share Button + PS Button for 3 seconds
  4. Choose option Register and Connect to Bluetooth Device
  5. Wait to Raspberry Pi find the PS4 controller
  6. Choose the PS4 controller
    • Look that the list does not show the device name. Turn off all bluetooth devices to show only PS4 controller.
  7. Choose the option DisplayYesNo

Uninstall RetroPie

If in the future you want to uninstall RetroPie, you can do it just selecting the option Uninstall RetroPie in the main menu

  1. On you Raspberry Pi terminal, run RetroPie installation menu using the commands cd ~/RetroPie-Setup and sudo ./retropie_setup.sh and choose the option Uninstall RetroPie
Uninstall option on RetroPie

Thats it! Now you can play your retro games with you PS4 controller without any cable. Bye!

Installing Docker + Portainer on Raspberry Pi OS

Hi, in this post we will install Docker on Raspberry Pi and Portainer to manage our container using any web browser from another computer. Docker ables to us to install/uninstall tons of softwares with a simple command.

Installing Docker

First of all, lets install all prerequisites:

sudo apt-get install apt-transport-https ca-certificates software-properties-common -y

Now, we can install Docker:

curl -fsSL get.docker.com -o get-docker.sh && sh get-docker.sh

After Docker installation, lets put pi user on Docker group to run commands without sudo:

sudo usermod -aG docker pi

To keep docker update, lets add Docker repository Raspberry Pi OS:

  1. Import Docker CPG key
    • sudo curl https://download.docker.com/linux/raspbian/gpg
  2. Edit repository sources to add Docker Repo
    • sudo nano /etc/apt/sources.list
  3.  Add the following line:
    • deb https://download.docker.com/linux/raspbian/ stretch stable
  4. Press Ctrl+X and Enter to save the file
  5. Press Y to confirm
  6. Run sudo apt-get update
  7. Run sudo apt-get upgrade
  8. To start Docker, run sudo systemctl start docker.service
  9. To ensure that Docker will start on boot, run sudo systemctl enable docker.service

Install Portainer

To install Portainer:

  1. Create portainer Docker volume with command docker volume create portainer_data
  2. Run the command bellow to create Portainer container:
docker run -d -p 9000:9000 \
--name portainer \
--restart unless-stopped \
-v /var/run/docker.sock:/var/run/docker.sock \
-v portainer_data:/data portainer/portainer

--restart unless-stopped will configure the container to aways start unless receive a stop command

You can check check the container running just typing docker ps on the command line. To access Portainer, use any browser like Chrome or Firefox and type your Raspberry IP address and use port 9000, in my case http:192.168.15.26:9000

In your first access, configure your username and your password and click on Create User:

In the next screen, choose the Local option and click on Connect:

Thats it! Your Portainer is configured to manager your container:

Clicking on the first option, or typing on the URL http://YOUR_IP_ADDRESS:9000//#/dashboard, you can see curious informations about your Docker environment

Maybe is time to delete some Docker images to free my MacBook SSD.. kkk

That’s it for now. Based in this configuration, we will do cool thing to automate your house using on the future the Home Assistant as Docker Container. Bye!

Enabling and configuring SSH on Raspberry Pi OS

In this tutorial, I will show how can you enable SSH on Raspberry Pi OS. SSH aims to facilitate the access of your system command line from another computer. In my case, I use a MacBook, and I configure my Raspberry Pi without need any device plugged on it, only the power adapter.

On the Rapberry Pi OS, press Ctrl+Alt+T to open the terminal and type the commands bellow:

sudo systemctl enable ssh 

sudo systemctl start ssh

The first command you enable the SSH service and the second command will start SSH

Access Raspberry Pi OS from another computer using SSH

Using Linux, Mac and Windows 10 (most current versions) you use the terminal or prompt (Windows) to use SSH. Just type the command ssh [email protected] type your password as requested and done!

192.168.15.26 is my Raspberry Pi IP Address. You can find you IP, just typing hostname -I in the Raspberry Pi OS terminal.

On old versions of Windows, you will need to use PuTTY SSH client. You can check here how you can install and use it

Configuring SSH public/private key on your computer

If you want to access the Raspberry Pi using SSH, but don’t wanna type the password giving up security, you can use SSH public/private key to access like the image bellow:

To generate the private/public key:

  1. run the command ssh-keygen
  2. Enter a passphrase if you want. If not, just press enter
  3. Confirm your passphrase, or just press enter for no password

Configure public key on your Raspberry Pi OS

  1. Run the command cat ~/.ssh/id_rsa.pub to get the public key
  2. Copy the key exposed by the command cat
  3. Enter on Raspberry Pi OS using the command ssh pi@YOUR_IP_ADDRESS
  4. Run the command mkdir ~/.ssh && touch ~/.ssh/authorized_keys to create .ssh folder and the authorized_keys file
  5. Run the command nano ~/.ssh/authorized_keys to edit the file
  6. Paste the public key exposed on step 2
  7. Press Ctrl+X and Enter to write
  8. Press Y to confirm the write on the file and run the command exit to close the SSH connection with Raspberry Pi OS
  9. Now you can connect into your Raspberry Pi OS without type any password using the same command ssh pi@YOUR_IP_ADDRESS

For older versions of Windows, Cmder can help you with run unix commands on Windows and PuTTY to generate the SSH key.


That’s it for now! I’m very happy to help you to configure Raspberry Pi OS SSH. Bye!

Installing Raspberry OS on Raspberry Pi 👨🏽‍💻

In these tutorial, I will show you how can you install Raspberry Pi OS on Raspberry Pi board.

First of all, we will need to download the Raspberry Pi Imager, to flash the SD card with the OS image. The software is available to all operacional systems.

Flash SD card using Raspberry Pi Imager

  1. Start the Raspberry Pi Imager and click on CHOOSE OS
  2. Select “Raspberry Pi OS (32-bit)”
    • This image comes with desktop interface, but without recommended softwares like Libre Office. I recommended because the image is soft and all softwares can be installed after the OS installation.
  3. Click on CHOOSE SD CARD
  4. Choose your SD Card adapter
  5. Click on WRITE
  6. Wait the process finish
  7. Remove the SD and plug on Raspberry Pi

Configure Raspberry Pi OS

With the SD card plugged on Raspberry Pi, turn it on. The Raspberry Pi OS will start to be configured.

All configuration screens

In the first configuration step, set your Country, Language, and Timezone, then click Next.

Enter a new password for your Raspberry Pi and click Next.

Connect to your WiFi network by selecting its name, entering the password, and clicking Next.

Note: if your Raspberry Pi model doesn’t have wireless connectivity, you won’t see this screen

Click Next let the wizard check for updates to Raspberry OS and install them (this might take a little while).

After all steps before, the Raspberry Pi OS will show the Setup Done dialog. Click on Restart

After the system restarts, you will have the Raspberry Pi OS desktop environment configured.

Official tutorial page:

The Clean Architecture

To start this article, I have some questions for you:

  • When you start a project, how do you choose the project folder/package structure?
  • Can you change your database without change your business rules?
  • Can you test your business rules without any UI, database, external service, etc?

If you can’t answer these questions without difficulties, I will present for you, the Clean Architecture by Robert C. Martin (Uncle Bob).

Source and credit: http://blog.cleancoder.com/uncle-bob/2012/08/13/the-clean-architecture.html

For all these questions and more, these architecture provides us a layer way to fallow that turns the core layer Enterprise Businesses Rules from the external layers like Frameworks and Drivers.

Here is the summary off the responsibility description of all Clean Architecture layers:

  • Enterprise Businesses Rules (Entities): Layer that encapsulate the business entities and has the specific business rules.
  • Application Businesses Rules (Use Cases) : Layer that encapsulate all application rules.
  • Interface Adapters: Layer that has the purpose of convert data in the most accessible and convenient way possible to the Entities and User Cases layers.
  • Framework and Drivers: Layer that has tools like database, user interface, etc.

Source and credit: https://8thlight.com/blog/uncle-bob/2012/08/13/the-clean-architecture.html .https://www.codingblocks.net/podcast/clean-architecture-make-your-architecture-scream/

Only four layers?

No, there is no rules that says you aways will have 4 layers. You may find that you need more than these 4 layers, and you can implement, but you have to keep the layer dependence where the external layers has the dependence of the internals layers.

Conclusion

Use the Clean Architecture may help you with a dependence pattern to implement your project, your tests and make changes on your project more easily beyond keep your project structure and code more clean.

In the next Clean Architecture article, I will show you how can you implement a project using all the layers that these architecture provide us, but you can find a done project mine here.

For the comments, I would like to know if you use the Clean Architecture or if will you start to search to implement on your project? See you next time!

Project Lombok

When you create a Java domain class with JavaBeans pattern, in other words, with all encapsulated attributes and the default constructor, Don’t you think there is unnecessary code in you java class?

For this problem, I present you the Project Lombok that help us to clean our code and give us annotations that removes the necessity of create methods like getters, setters, constructors, hash, equals, etc.

Lombok in action!

Person class without Lombok:

import java.time.LocalDate;
import java.util.Objects;

public class Person {

    private String name;

    private LocalDate birthDate;

    private String email;

    public Person(String name, LocalDate birthDate, String email) {
        this.name = name;
        this.birthDate = birthDate;
        this.email = email;
    }

    public String getName() {
        return name;
    }

    public void setName(String name) {
        this.name = name;
    }

    public LocalDate getBirthDate() {
        return birthDate;
    }

    public void setBirthDate(LocalDate birthDate) {
        this.birthDate = birthDate;
    }

    public String getEmail() {
        return email;
    }

    public void setEmail(String email) {
        this.email = email;
    }

    @Override
    public boolean equals(Object o) {
        if (this == o) return true;
        if (o == null || getClass() != o.getClass()) return false;
        Person person = (Person) o;
        return Objects.equals(name, person.name) &&
                Objects.equals(birthDate, person.birthDate) &&
                Objects.equals(email, person.email);
    }

    @Override
    public int hashCode() {
        return Objects.hash(name, birthDate, email);
    }

    @Override
    public String toString() {
        return "Person{" +
                "name='" + name + '\'' +
                ", birthDate=" + birthDate +
                ", email='" + email + '\'' +
                '}';
    }
}

Person with Project Lombok:

import lombok.AllArgsConstructor;
import lombok.Data;

import java.time.LocalDate;

@Data
@AllArgsConstructor
public class Person {
  private String name;

  private LocalDate birthDate;

  private String email;
}

Here we can see, a file with 65 lines was reduced to 14 lines. Incredible, Don’t you think?

Lombok Configuration

To use Lombok in your project, you will need to configure your IDE and add a dependency in your pom.xml or build.graddle of your project.

Configure your IDE:

To include Lombok dependency, add it to your <dependencies> block if you are using Maven:

<dependency>
    <groupId>org.projectlombok</groupId>
    <artifactId>lombok</artifactId>
    <version>1.18.6</version>
    <scope>provided</scope>
</dependency>

Or add it if you are using Graddle:

repositories {
	mavenCentral()
}

dependencies {
	compileOnly 'org.projectlombok:lombok:1.18.6'
	annotationProcessor 'org.projectlombok:lombok:1.18.6'
}

Lombok Annotations

All Lombok annotations, you can find here.

Conclusion

I really like Project Lombok and I think that it will be incorporated in a future Java version. Project Lombok creates the code when the project is compiled, so if you aren’t use the code that Lombok creates, your compiled java class will have unnecessary code instead your Java file.

For the comments, I would like to know if you use Lombok or if will
you start to use? See you next time!

Hello World!

Hi! my name is Alan Santos. I’m currently a developer a back-end software developer at Netshoes Group, working using Java with Spring Framework with Restful microservices focus.

I chose to create this blog to share my knowleges with you and show who
I’m and what I work with.

In this blog, I will post tutorials for you know one way to implement APIs using Java and Spring and how to deploy this using Docker and Docker-compose.

Everything will be writen about the projets that I exposed in my portifolio page, like URL-SHORTENER project

Here a list of all the subjects that I will post in this blog:

  • Java
  • NoSQL (MongoDB, Redis)
  • SQL (Oracle, SQL Server, Postgree and MySQL)
  • Spring Framework (Spring Boot, Spring Cloud, Spring Security, Spring Data, Spring Kafka, Spring AMQP)
  • Docker and Docker-Compose
  • Kubernetes

And here one list that everithing that I’m studing or I will study soon to post on this blog:

  • Swift 4
  • Kotlin
  • Android

Let me know what your expectatives about the future posts in the comments down bellow. See you next time!

EnglishPortuguês